NOTE: Recently, the app has updated a few parts of the interface, adding new buttons here and there. As such, some screens may be outdated. Sorry about that!
Hey everyone! Recently I’ve been really into Angel Beats! Operation Wars. It’s basically a mobile game involving Angel Beats characters and puzzle games to defeat Shadows  You can find more info and download links here: http://abow.jp (iOS must have a JP iTunes account and Android must have a Japan VPN).
Anyways, since not everybody knows Japanese (myself included), I thought I’d make a guide since I’ve been able to figure out most mechanics of the game through tinkering around and previous JP mobage knowledge. Without further ado, OPERATION START!
Upon first installing the game, you will be greeted by the login page:
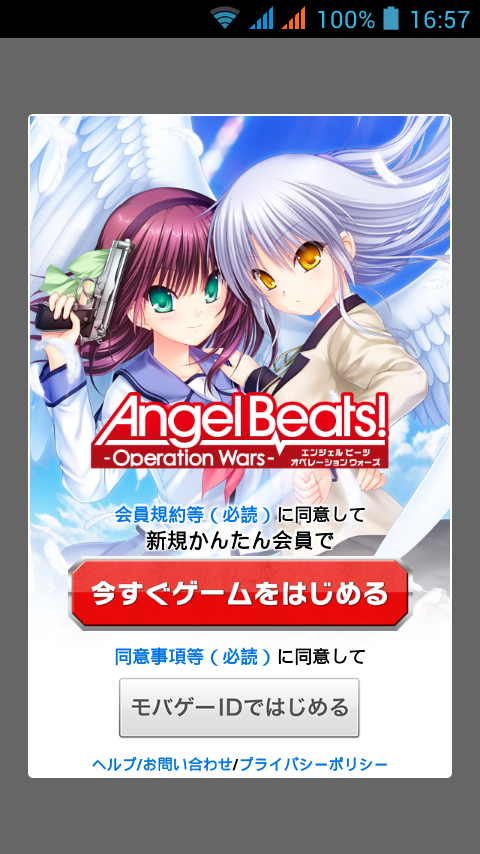
That big red button there is kind of like a “Quick Start” button. If you don’t have a mbga account it will create one for you, or if you are logged into your account in your default browser, it will use that account. If you do have one, you would probably want to use the second button (because I ended up creating two accounts because of that). Note that if you use the quick start, you may have to set-up your account (put in an e-mail address and password) otherwise, you won’t be able to back-up your account.
After going through the long tutorial (which should already demonstrate the basics of the gameplay for you), or if you already have an account and everything, you will get to the main page:

I’ve labeled the different parts of the main screen, so here’s an explanation of each:
- Your current level
- AP, or Angel Points. You need this to start operations. If you run out, you’ll have to wait a bit, or use a Key Coffee (explained later)
- Your in-game nickname
- Beats! which is pretty much the in-game currency. Needed for leveling up cards or starting Lives.
- Inbox. If you are expecting a free item, you can get it here.
- Friend requests. Shortcut to the friends menu as well
- Operation Wars Manga
- Your current meal tickets. Used to create weapons or get new cards.
- Leader of your previous battle. If you poke him/her, he/she will make cute noises That is, assuming the character is voiced.
- Operation menu. This is where you get Beats!, Cards, Medals, and a whole bunch of other stuff.
- Live performance menu. This is where you get meal tickets. Yes, it is Operation Tornado

- Advertisement for the current “gacha”
- Main screen shortcut
- Cards management
- Weapons management
- Shop
- Gacha (used to obtain new cards)
- Others menu
Let’s start with the Live Menu first, since you would ideally want to perform a Live before going on an Operation:
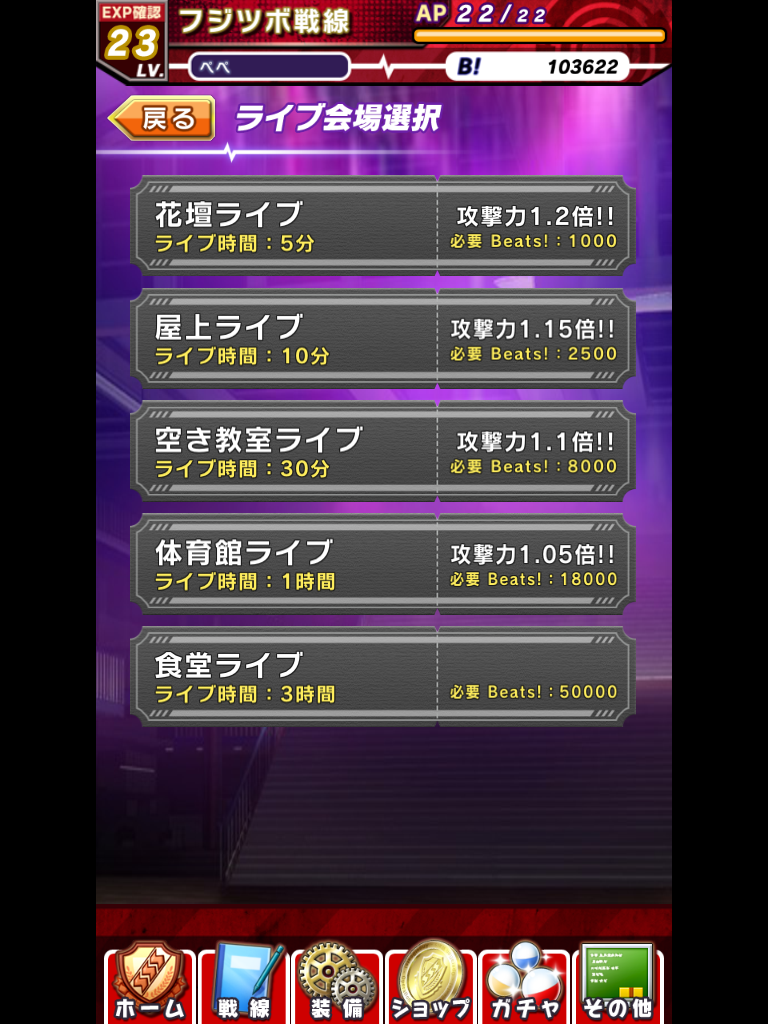
When performing a live, you can select different lives, which all have different costs and effects. Each option in detail:
- 5 mins length live, 1.2x attack bonus in Operations, Costs 1000 Beats!
- 10 mins length live, 1.15x attack bonus in Operations, Costs 2500 Beats!
- 30 mins length live, 1.1x attack bonus in Operations, Costs 8000 Beats!
- 1 hr length live, 1.05x attack bonus in Operations, Costs 18000 Beats!
- 3 hrs length live, No attack bonus in Operations, Costs 50000 Beats!
After selecting what kind of live you will perform, you then choose the characters to perform in the live:

To be honest, I’m not exactly sure if the characters’ stats or properties affect the outcome of the live, so I just like to balance out things by choosing one character each of a different color. Note that after selecting character for a live, you cannot use them for operations or management. Once you’re done selecting, press that big red button near the bottom to start the live:
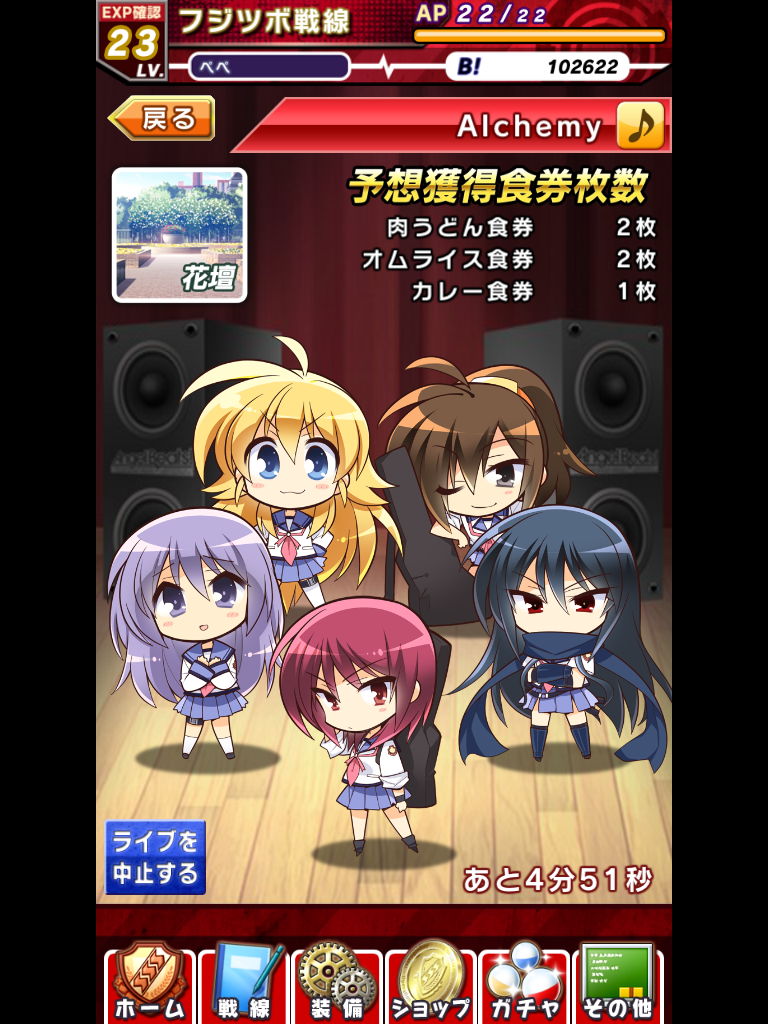
You get to see the “performance” and listen to the song being performed, and you also see how much meal tickets have been obtained so far in the top-right. The bottom-right also shows how much time left in the live. You can revisit this screen anytime during the live by pressing the Live button on the Main screen. Once it’s over, the Live button will turn yellow, and you can press it to claim your meal tickets! Unfortunately, the Mapo Tofu is pretty rare so most of the time you won’t get it, unless Kanade is feeling a bit hungry
Now, on to operations!

First screen is the operation select menu. You can choose a new operation, or replay an already cleared one. You can also press the button on the top-right (under your Beats!) to play special missions and unlock more card slots for your characters. These special missions change every day.
After selecting an operation:
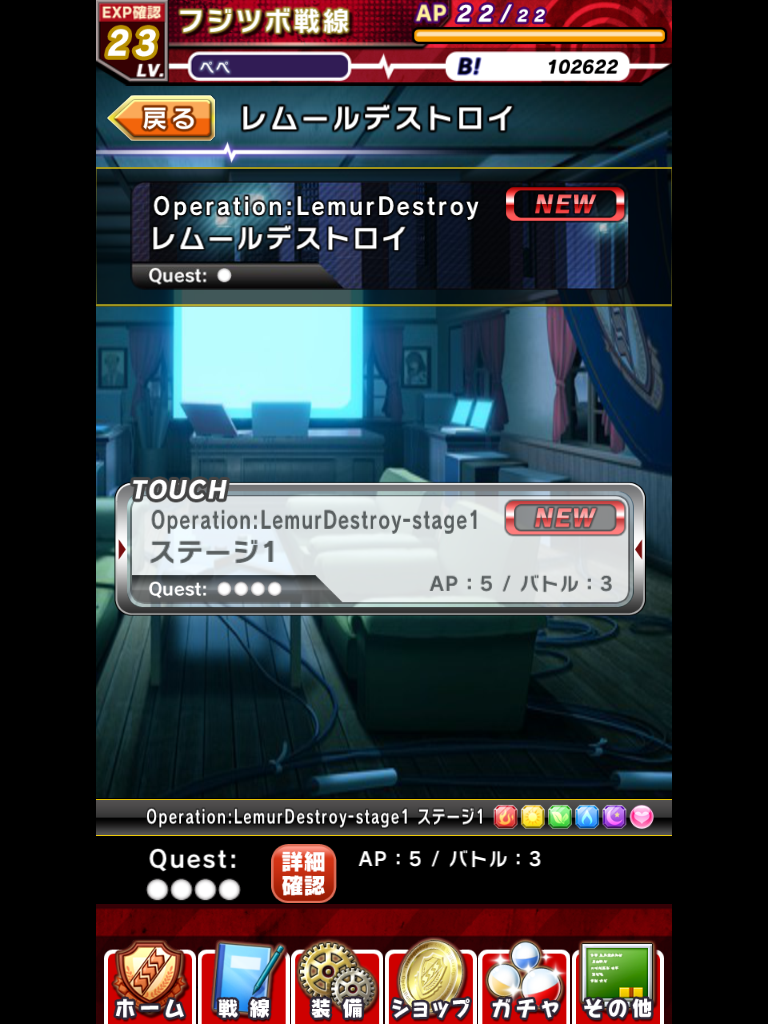
You select a stage. On the lower right, you can see the AP cost and how many battles the stage contains, along with the elements included in the battle. I haven’t had a battle yet that doesn’t give all elements, but I guess it’d be possible. You can also press that red button beside the “Quest” to see the different side-quests that’d gain you extra rewards at the end of a battle, though it’s kinda hard to understand what they are without being able to read them. After selecting a stage:
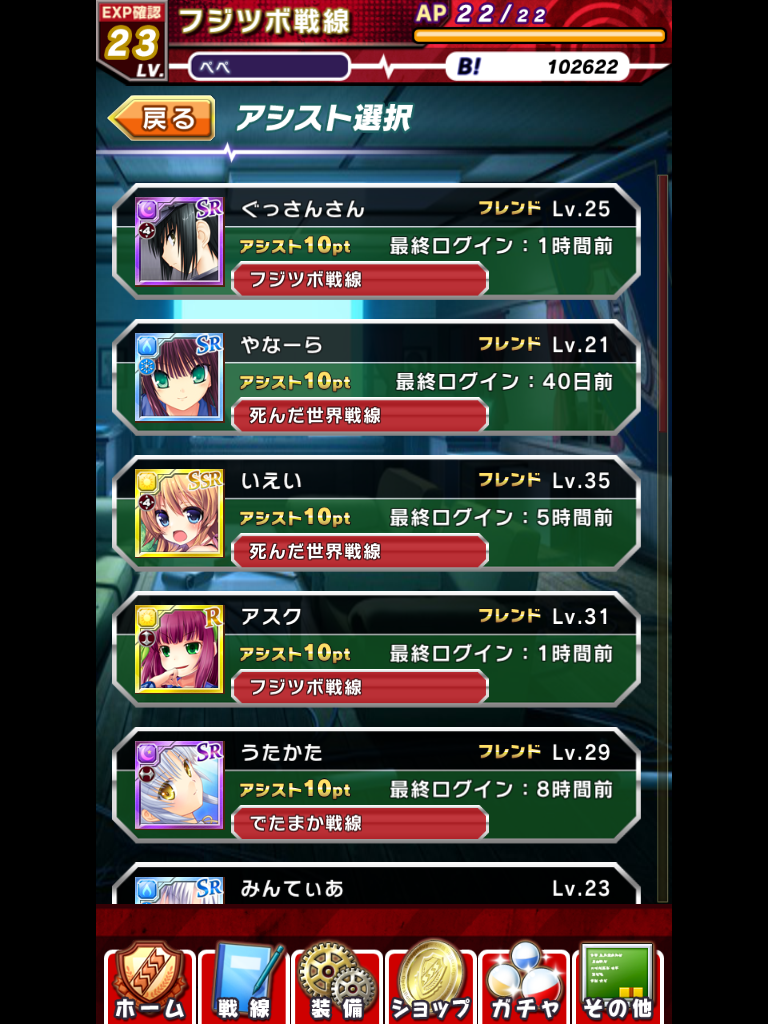
Select a friend! If you have friends added, you can select them and get 10 assist points, or just select another random player and get 5 assist points. After selecting a friend:

Here is where you build up your operation team. On the top, you can see your current team, and exchange them with other available cards. Under those, you can see your team summary: HP, attack power of each element, and heal power. Now, ideally, you would want to select at least one character for each color, which will be explained later on. Again, press the big red button on the bottom to start the operation. The operation, looks more or less like this:
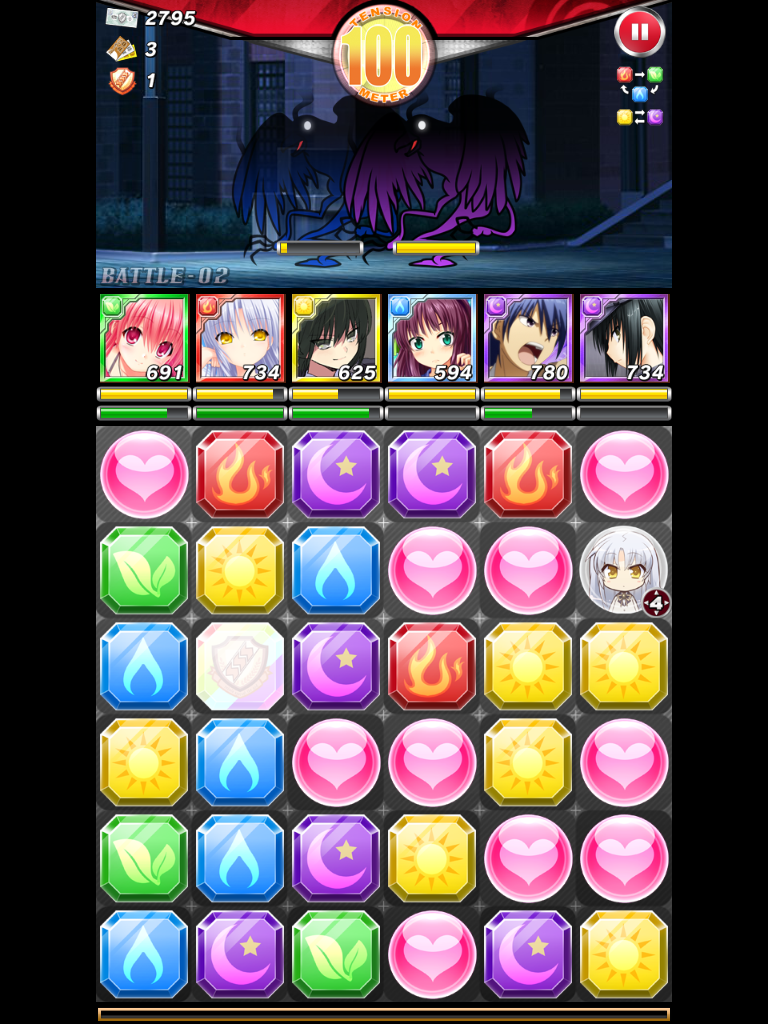
Basically the goal of the game is to match adjacent same-element tiles, either vertically, horizontally, diagonally, or a mix of all. The tutorial should have explained this concept well enough, I would think.
One thing to note is that when you clear a set of elements, your character with that element will start an attack, and the amount of damage will be based on how many adjacent tiles you match. Also, enemies have weaknesses, as shown in the upper right, under the pause button. Fire is weak to water is weak to grass is weak to fire, and sun and moon are weak to each other. In the example above, where the enemies are blue or purple, you’d want to match either grass tiles or sun tiles to inflict the most damage. You can also select which enemy to attack by tapping on that enemy before touching any of your tiles.
You can also match the heart tiles to heal your characters. You’d wanna do this on a regular basis, because when a character dies, he/she is out of that operation. You lose when all your characters die, obviously
If your character dies, or if you neglect to select a character of a certain element, clearing tiles of that element will do absolutely nothing except clear space on the game area.
You will see your characters above the tiles, their HP as the yellow bar, and the power-up as the green bar. I’m pretty sure you can only fill up that green bar once you equip a weapon to your character. This fills up as you match tiles with the same element as the character.
There are also special tiles, if you notice, the rainbow SSS badge, and the character icon. The character icon appears when a character’s power up bar reaches max. If you tap it, it’ll eat up certain tiles, depending on your weapon (the kanade tile pictured above will eat the 4 tiles adjacent horizontally and vertically), and give bonus damage. The rainbow SSS badge tile will only appear once your Tension Meter reaches 100. Tap it at the beginning of your turn to start a “Tension Attack” (or whatever they call it in Japanese):
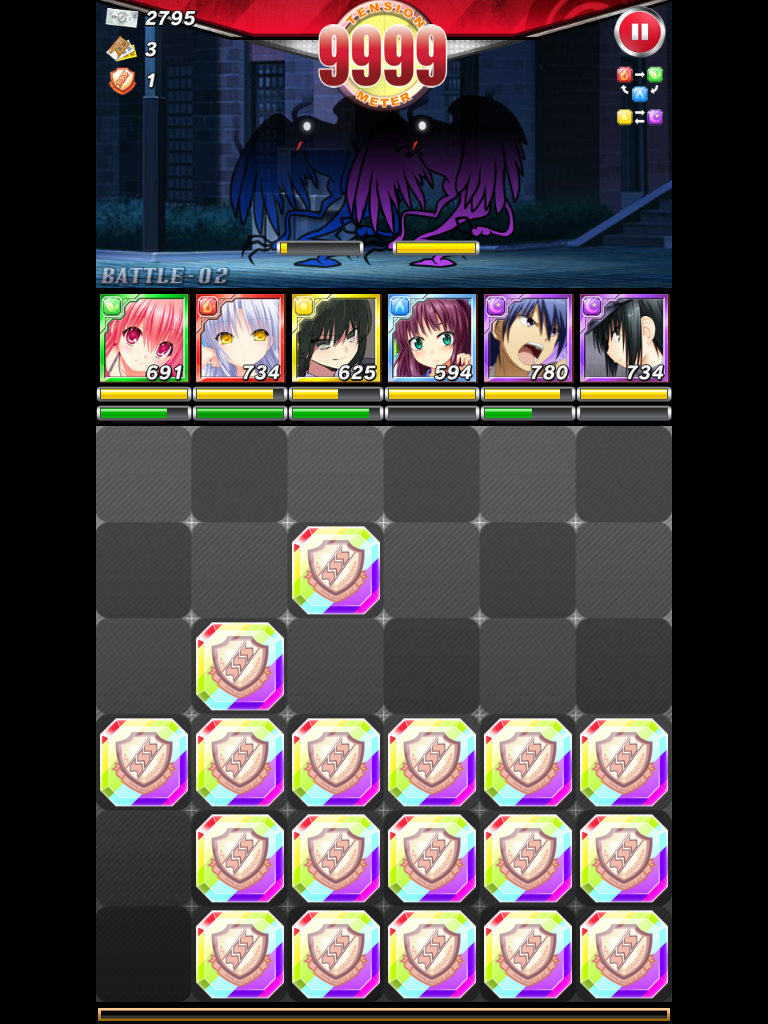
The goal of this part of the game is to match as much tiles as you can in one movement. I’m sure the tutorial demonstrated this as well, so I won’t go into further details. I guess just eat up as much tiles as you can, and try not to get too confused, as this is time-constrained. Once you complete one set of tiles, another one appears, and this repeats until your time runs out. More tiles means more damage, and I assume you get a bonus for getting it perfect.
Now, if you finish all battles, then congratulations! The result screen looks like this:

You can see which cards you were able to get from the battle, and how many meal tickets. There’d also be a pop up if you got anything extra like medals, assist points, etc etc. And if you selected a random player earlier, you’ll be given the option to add them as a friend.
Now for the next most commonly used part of the game, Cards management. If you press the cards management shortcut, you’ll see this screen:
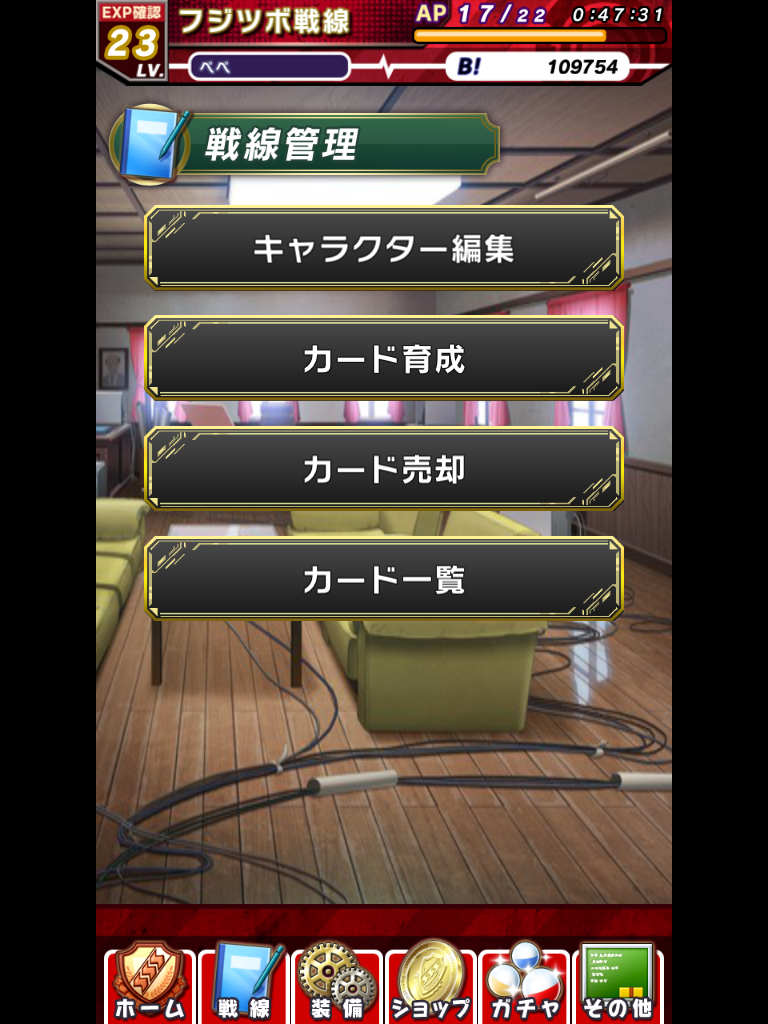
The options are as follows:
- Character management
- Card leveling
- Sell cards
- Card info
The character management looks like this:
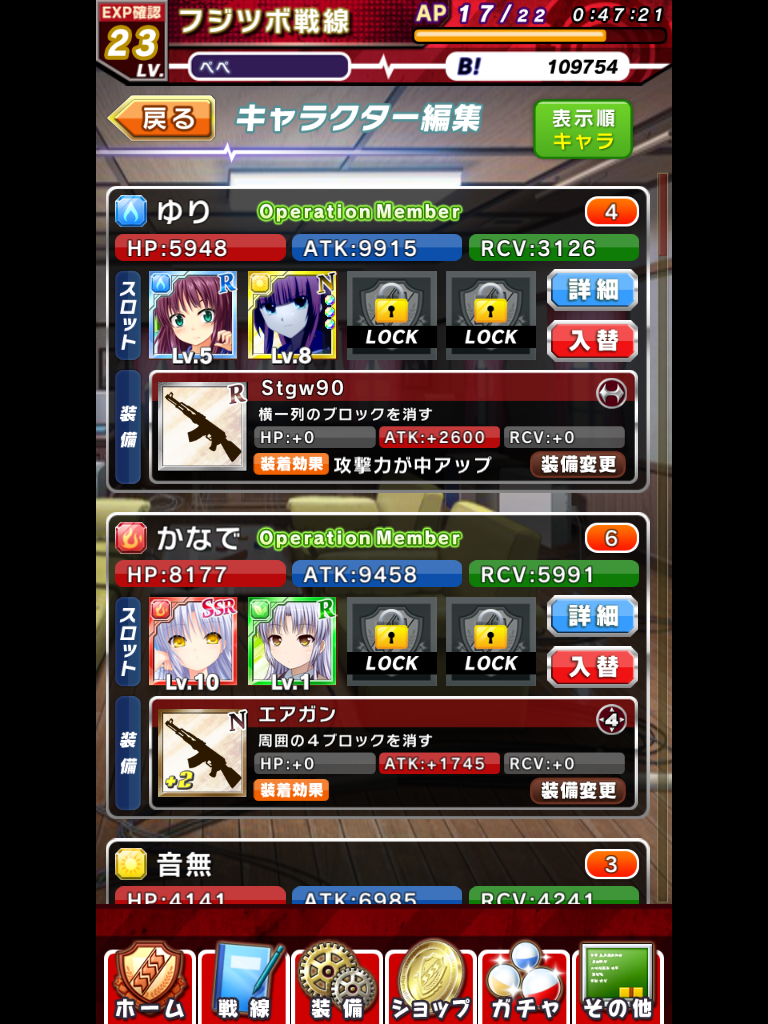
This is actually an alternate, more detailed view of the character management. You can toggle between this and the default by pressing the green button in the top-right, then pressing the red button.
Anyway, a bit of explanation first. Despite characters having many different cards, you can only use one character at a time for lives and operations. The attack, hp, element, and other properties of your characters are controlled in this screen.
In this view, you can see which cards are being used by your characters, their stats (explained in card info), and the weapon equipped, if any. You can press the blue button to get more info, or the red button to switch cards for your character.
Info screen:

This is pretty much just a zoomed-in version of the detailed list shown a while ago. Press the red button here as well to change the character’s cards, or press the weapon area to change the equipped weapon.
Switch cards:

Here you can change the cards used by the characters. The first card from the four will determine the character’s element, then the HP, ATK, and RCV is just a total of the characters selected. You can unlock the third and fourth slots by playing the special missions. Beside the red button is the cost. Each card has a cost, and rarer cards cost more to use. As you can see Yui has a max cost of 18, so selecting too many rare cards for her might max out the cost. If you max out the cost, the game will cut down the stats of the cards that went over the cost (sometimes to the point of it being more worth it to just select lower-costing cards).
Personally, I like to max out the total ATK stats of all my characters. I kinda ignore the HP and RCV unless I start to lose battles, or if they become significantly lower than my other characters. The green button in the lower-right has a handy sort function, and it works the same way in pretty much everywhere that it appears. Anyways, you can press the red button to save your changes and go back to the character management menu.
Card leveling:

Here you can level up your cards and increase their stats by feeding them other cards! Yes, I know, it is a very cannibalistic game, much like most other mobage are. Basically, just tap a card to select it and enter the leveling screen:

Then tap the cards in the bottom to line them up for feeding! Note that you can’t choose cards in use by the character (shown with the “DECK” icon beside the card). The cards you select for feeding will give experience to the selected character, based on their level and element. The higher the level of the card to be fed, the more experience it gives, and if it is the same element or same character as the selected card, you also get a bonus. Higher bonus to be given if it is both the same element and character. Oh yeah, and it costs Beats! to level up your cards, so make sure you have enough in stock. Once you have finished selecting cards for feeding, press the red button.
Another tip is if you feed a card that is exactly the same as the selected card, you will get a Limit Break! All that does is increase the max level of the selected card, so it’s a late game thing more than anything. You can only limit break a maximum of 4 times. If you feed the card with a Limit Break to other cards, you will also get an even higher bonus. So to maximize your EXP bonus, feed your card with another card that is the same character, element and is fully Limit Break’d.
Card selling:

If you ever run out of Beats! you could always sell your cards to earn more. Just tap the cards at the bottom to line them up for selling, then tap the blue button to sell them for the indicated amount of Beats!
Card info:
The card selection menu looks exactly like the menu for card leveling, but after tapping the cards, you go to their info page:
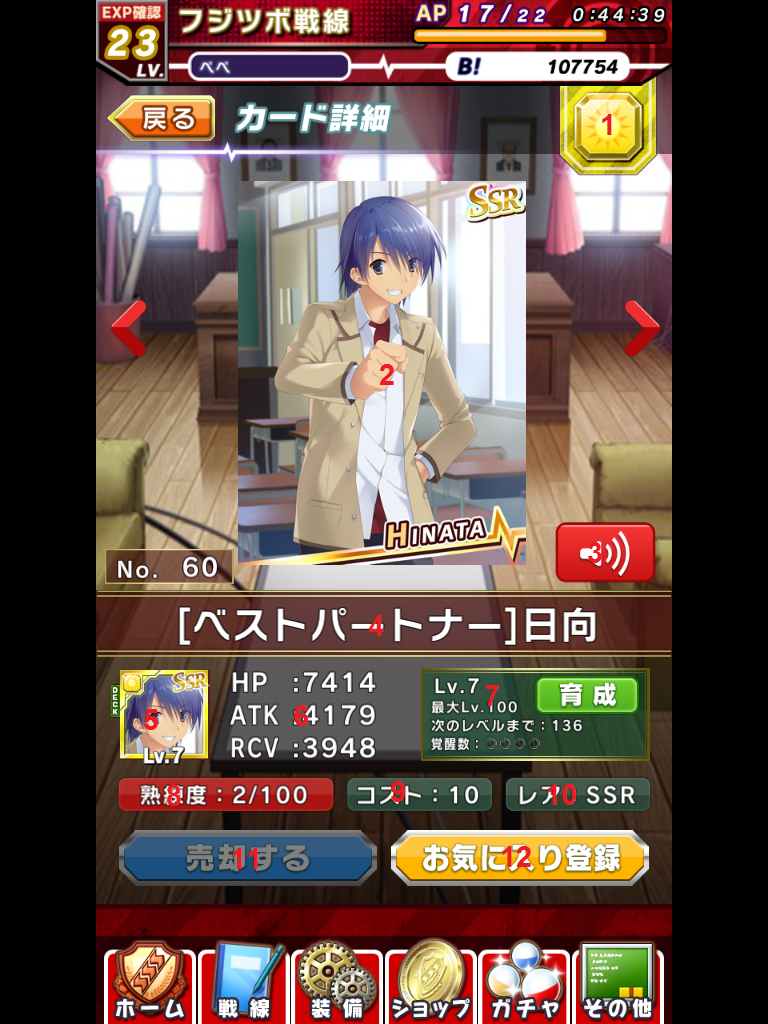
Info as follows:
- Element of the card
- Card design. You can tap this to zoom in.
- Audio preview. Only available for SSR cards, I think
- Card name
- Card icon
- HP, ATK, and RCV power
- HP: Hit points of the card. Your in-game hit points will be 10% of the total HP of your character.
- ATK: Attack power of the card. In-game attack power is calculated by the total ATK of your character, and how many tiles you clear of the element matching the one of your character’s main card.
- RCV: Recovery power of the card. Determines how much HP is healed based on the RCV of your whole team. That means all characters will heal the same amount after clearing a few heart tiles, and increasing the RCV of one character is enough to raise the amount of HP healed for your whole team.
- Current level, maximum level, experience until next level, and number of limit breaks. You can also press the green button to select this card for leveling.
- Supposedly your card’s “Skill Level.” I don’t know exactly how this works, though. If anybody can explain, I’d greatly appreciate it.
- Card cost, as explained a while ago in character management.
- Rarity. Rarest cards are SSR, followed by SR, R then N
- Sell this card.
- Toggle card as “favorite.” You should do this for cards you wouldn’t want to lose as you might accidentally feed them or sell them.
Now onto weapons management!
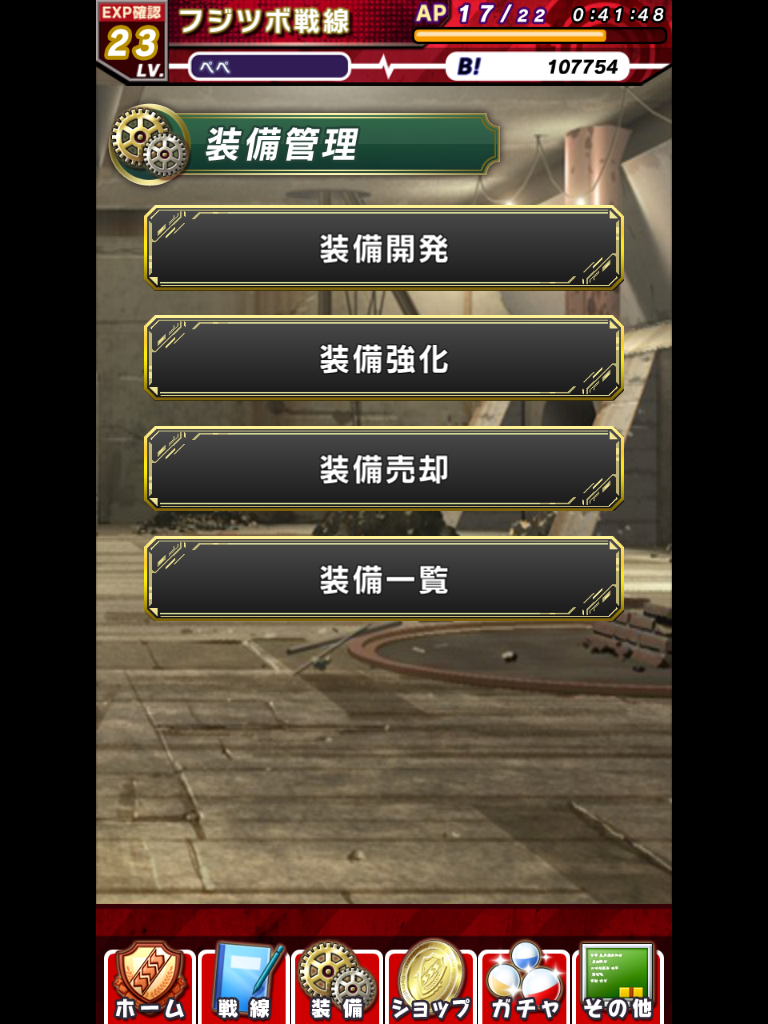
Options are as follows:
- Create weapons
- Merge weapons
- Sell weapons
- Weapon info
Creating weapons:
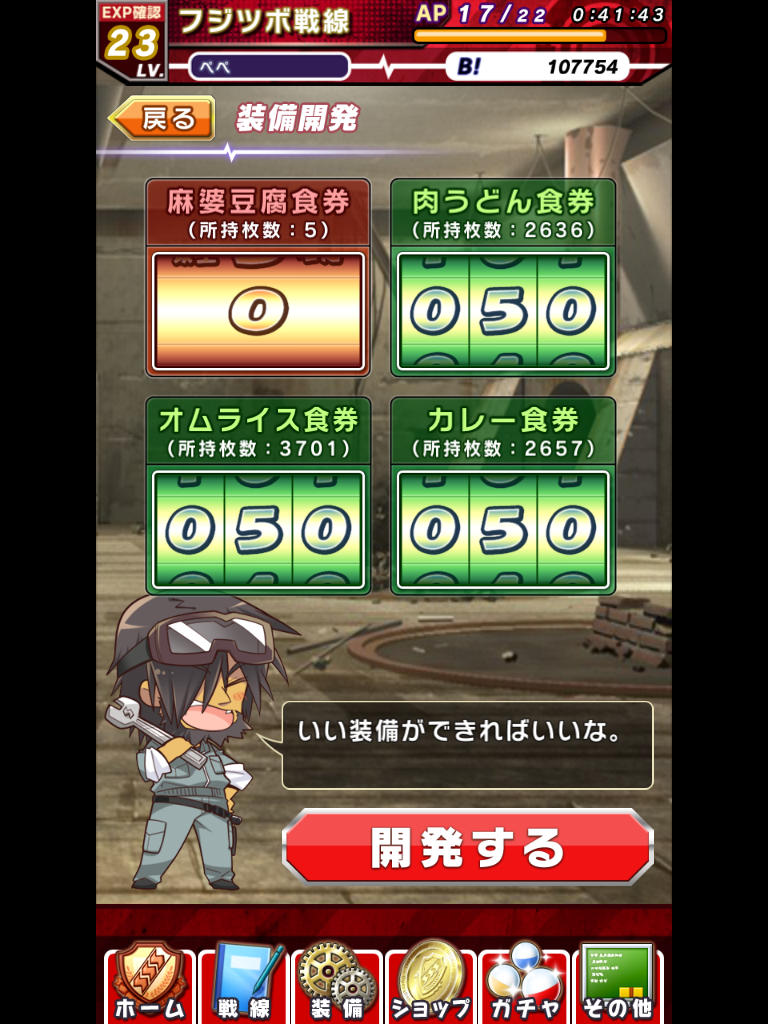
Here, you can offer meal tickets to create weapons. The poor boys in the Guild need food to survive, too!
I’m not exactly sure how the amount you give affects the weapon you get, but I assume the more you give, the better. You can also offer Mapo Tofu tickets (3 at a time) for higher chances to get Rare weapons.
Merge weapons:
I don’t have a screenshot of this, but the basic concept is that if you have two weapons with exactly the same name, you can merge them to make them more powerful.
Sell weapons:
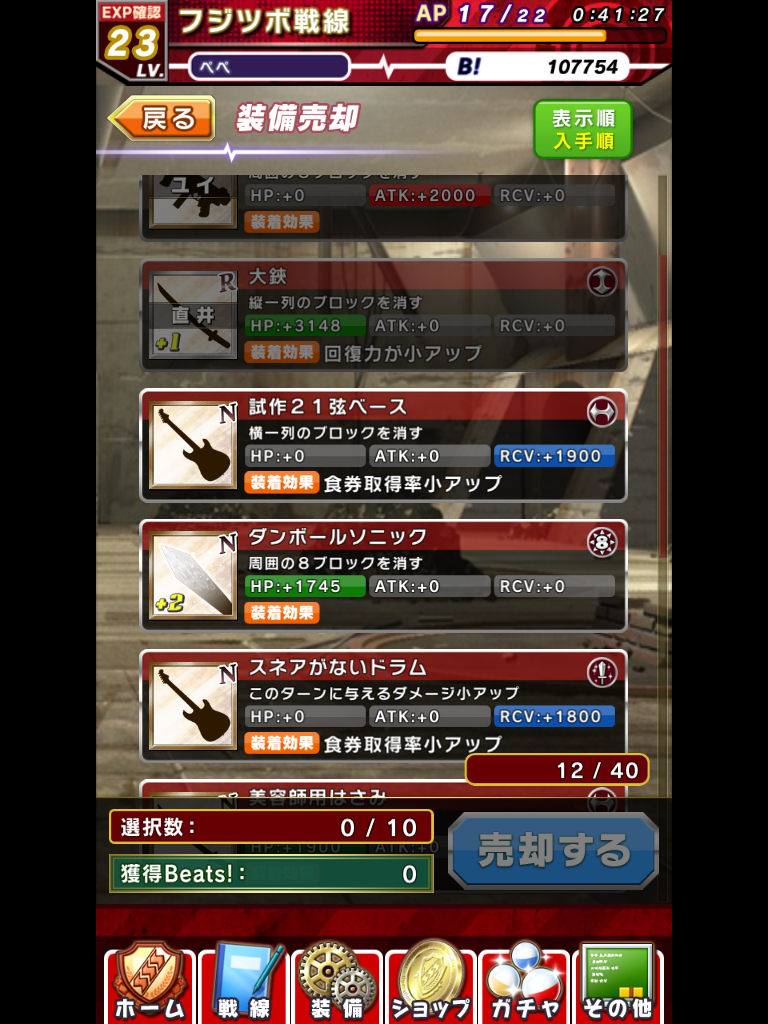
Similar to selling cards, you can also sell weapons to get more Beats! Just select them and tap the blue button to get the corresponding amount of Beats!. You cannot select weapons currently equipped, or marked as favorite.
Weapon info:
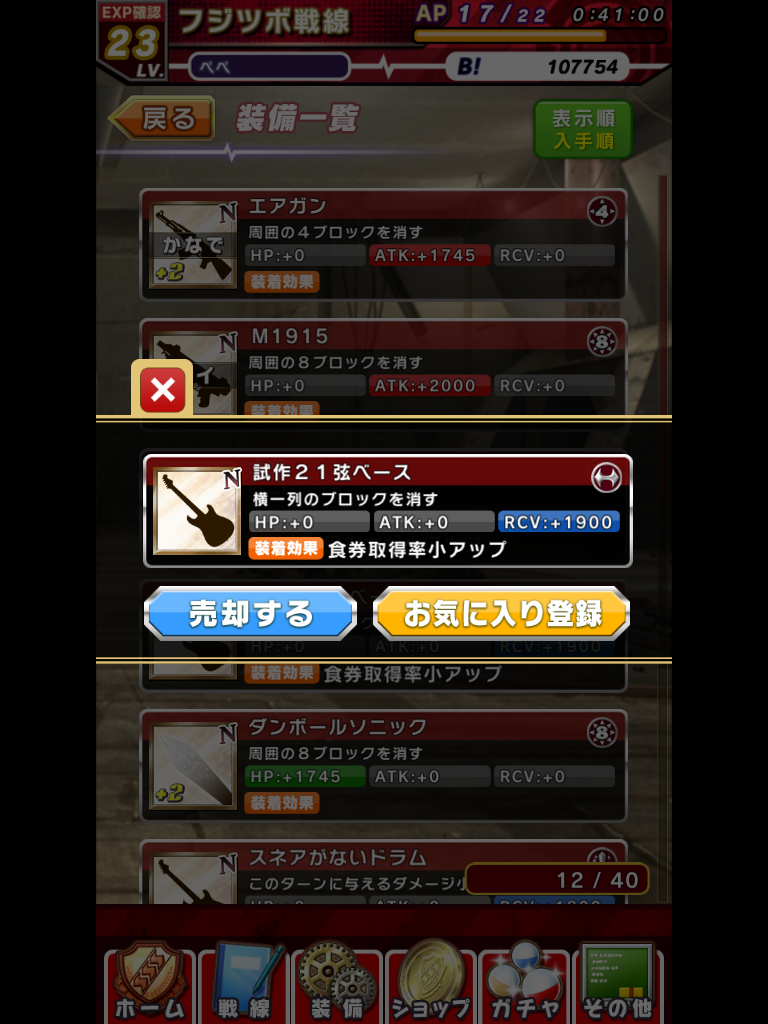
Here, you can tap a weapon, and view the weapon’s name, the tiles that it eats when you activate its power-up during operations, the bonuses it gives when equipped to a character, and you can sell it or mark it as a favorite.
Now onto the shop. Hold on to your wallets!
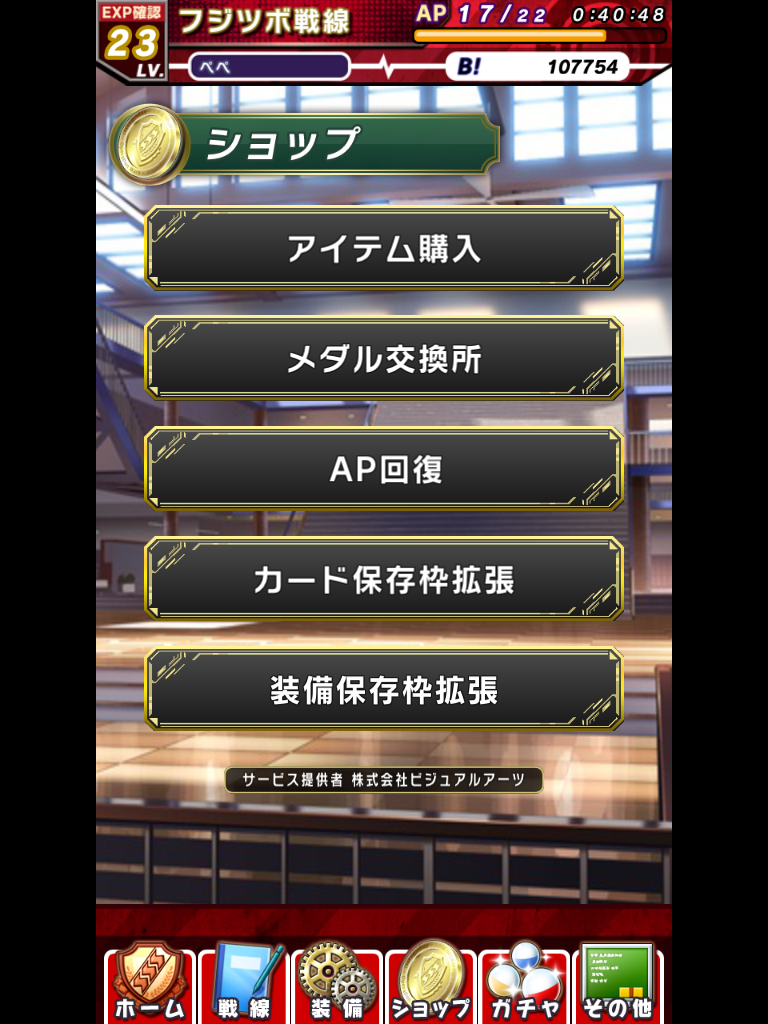
Options are as follows:
- Buy items with AB Coin (AKA Cash Money)
- Buy items with Medals (obtained from operations)
- Replenish AP by drinking Key Coffee
- Increase maximum card capacity (Also costs AB Coin). Sidenote: Yes, there is a maximum capacity for cards, and once you go over that, you won’t be able to do anything until you either sell some cards or feed them for leveling.
- Increase maximum weapon capacity (Also costs AB Coin).
Since I don’t spend any cash money for this game (yet), the only part I’ll be explaining is the medals shop:
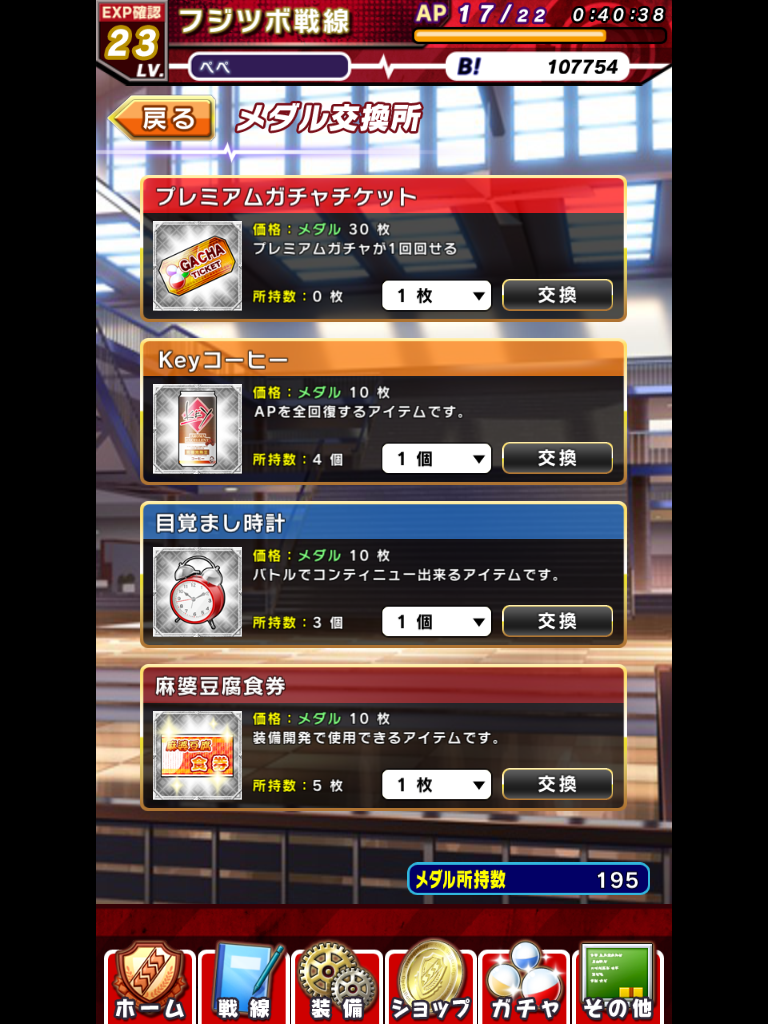
Options are as follows:
- Gacha Ticket: Ticket for the Premium Gacha. Costs 30 medals.
- Key Coffee: Used to replenish AP in the previous screen. Costs 10 medals.
- Alarm clock?: Supposedly allows you to retry an operation, should you fail during one. Costs 10 medals.
- Mapo Tofu meal ticket: If Kanade is too busy to buy some Mapo Tofu, you might as well buy your own . Costs 10 medals.
Next is the most moneygrabbing mechanic of the game, the Gacha:


There are 5 types of Gacha I have seen so far. In order of the images I posted:
- Daily Gacha: Log-in and get a card everyday. Mostly gives Ns, but may sometimes give Rs and SRs
- Bonus Ticket Gacha: You get this at random times, like through daily stamps or some operations. Gives you at least an R, with a 12% chance SR, and even lower chance of SSR.
- Premium Gacha: Whenever they start advertising new sets of cards, this is the only way to get them. You can either get them by spending AB Coin, or buying a Gacha ticket at the medal shop. Gets you at least an R (90% chance), with a low chance of SR (9%), and even lower chance of SSR (1%).
- Friend point Gacha: Remember those Assist Points you got by selecting friends for operations? Well you can use those points here to get cards. 100 points per card. Gives at least N, but with a low chance of getting an R or SR.
- Meal ticket Gacha: When all else fails, offer some Meat Udon to Matsushita and he will gladly join your forces! But yeah, you can spend your meal tickets to get cards if you don’t feel like making weapons. 100 meal tickets per card. Gives you N cards, with a low chance of getting an R or SR.
Others menu:
Won’t be posting a screenshot of the menu, but here are the options:
- News
- Account info (Mobage ID and you can change your nickname [blue banner] and Front name [red banner])
- Game stats
- Friends menu: Subdivided into:
- Find friends to add. You can also find by ID. (My ID is 979881249. Add me! :D)
- Your friends list
- Pending friend requests you made
- Pending friend requests made to you
- Invite friends. Basically you can share that ID of yours to friends, and when they input your ID, they get a free gacha ticket! (and vice-versa). I think your ID is limited to a certain amount of uses.
- Card library
- Weapons library
- Options
- Help
- Return to title screen
- Contact us
- Serial Code input. If you got the Kanade serial code from preregistering, you can enter it here. You might also get serial codes from buying AB merchandise

- List item
- Copyright info
- Log-out your mobage account
- Visit the mobage website
And that pretty much sums up how to play Angel Beats! Operation Wars. I hope this guide helps make the game seem less intimidating to people who can’t read Japanese, and it gets more of you folk to join me in playing this dangerously addictive game
If you have any questions or suggestions, feel free to comment them and I can edit my guide accordingly